Reflections on 150 days of work

Tomorrow is my 150th day of work as an electrician. Just to say that I have learned a few things in that short of time is dramatically understated.

I can now run pipe pretty well on my own, making fairly complicated bends in order to get from point to point in a way that is somewhat pretty. It is still gray metallic pipe, but at least it does not look like complete garbage. I’m not sure if I am ready to call myself “proud” of the pipe I put up. I need to be, though. Why? Because it is one of the primary things which this job relies on. Without the conduit, there are no wires running to switches, nothing to connect to lights, nothing to connect to the breaker panel. I need to work out any second guessing come to a point of 100% confidence. I am sure that will take awhile.

So, about the other aspects of the job: I have worked in the heat and cold, from a stagnant and humid space to a cold and windy rooftop. I have pulled and pushed wire of all sizes, made up joints, cut boxes into walls, run metal encased wire, put up lights, wired receptacles and switches, wired roof top HVAC units, read blueprints and other things that I am forgetting. There have been slow days and hectic, long weeks.

Most important of all is that I have made plenty of mistakes. Most of them have been minor – forgetting to tighten a connector or bending a pipe crooked or twisting wires the wrong way when making up a joint. A major mistake happened early on. I ran a steel fishtape (instead of fiberglass) down some conduit toward a hot breaker panel. I could have been seriously injured if the steel hit the live wires in the panel. Luckily there was an open box in the ceiling before the panel, so the fishtape ran out of that instead of continuing toward the panel. Another person caught the error and was able to stop me from doing anything else with it.

The point of mistakes is to learn from them. Everyone I have met doing this job has told me that mistakes are sometimes the only way to learn many aspects of the trade. And I have learned from every single one.
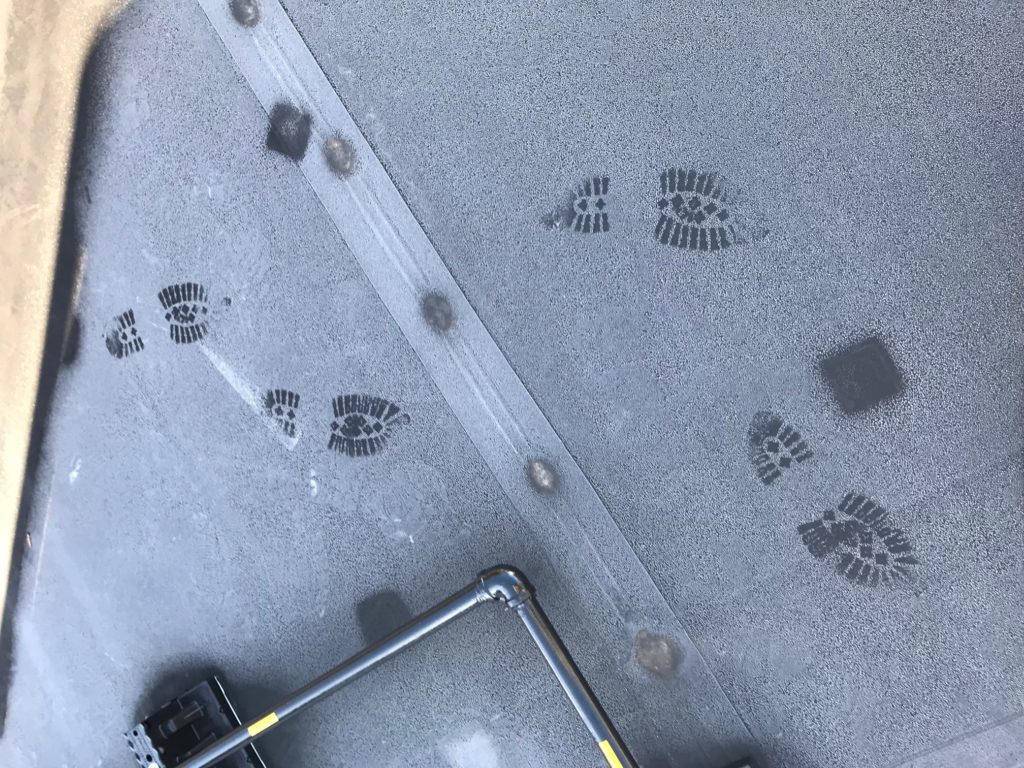
 

Boot marks in the roof frost.

Overall? I like this job, a lot. It is difficult work both physically and mentally, but that is what I like about it. Everyday is different and often challenging. I love learning to use new tools, too. Now that I have been learning the “hows” of the job, I am ready to learn some of the “whys” of what we do.
IMG_5357

I washed my notebook but remembered to write down how to cut in new outlet boxes

I keep a daily log of the work I am doing on a small memo book that I keep in my pocket. The pocket is low and on the side of my work pants, so I sometimes forget to take it out when I change my pants. I accidentally washed my last notebook. It contained twenty-five days of notes. This was a huge bummer. Thankfully I remembered one of the last entries. It was a step-by-step guide to installing what are called “cut-in” boxes. It is as glamorous as it sounds.

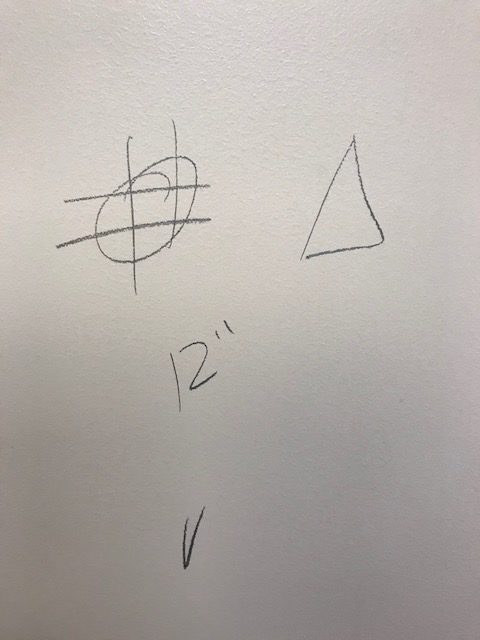
The first step is identifying where and what type of box will go in.  A foreman or mechanic will look at the prints and then come to the room where the box will be placed. They will mark on the wall the shorthand for the box.

instructions for cut-in boxes

instructions for cut-in boxes

The quick translation for the above is that there will be two electrical receptacles (indicated by the circle with the four hash marks) and a data port (indicated by the triangle) located twelve inches from the floor.

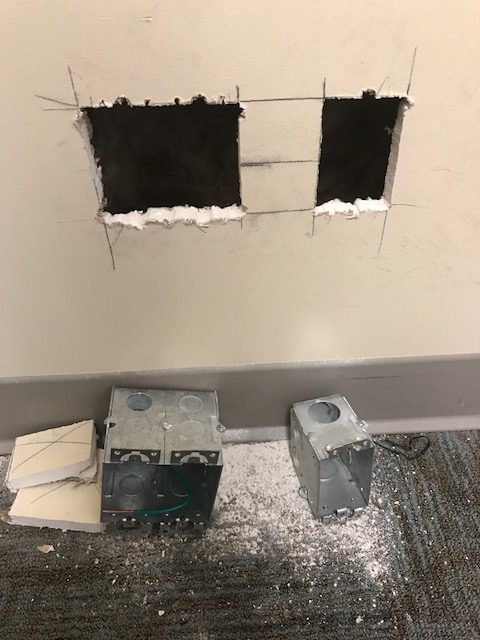
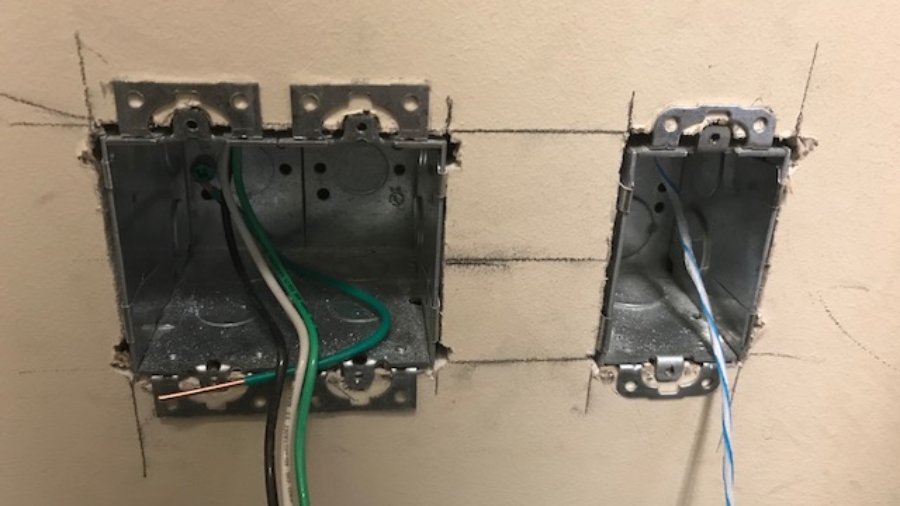
The next step is to mark out the cuts for the boxes by measuring out the size of each. Using a level and pencil, each cut is drawn. The cuts are made with a drywall saw (also called a sheetrock saw or a jab saw). Each screw and tab must be accounted for when cutting out the boxes. This is to ensure that the boxes fit flush with the drywall.

holes cut out

holes cut out

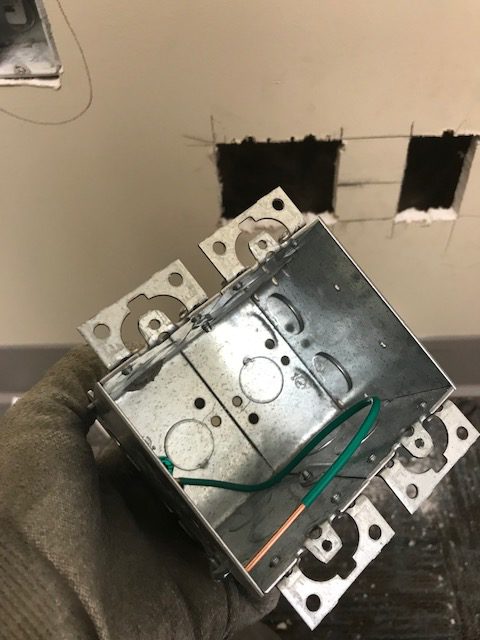
The box for the double receptacles is made by combining two cut-in boxes. The sides easily unscrew and come apart. A ground wire is added to the box.

double cut-in box

double cut-in box

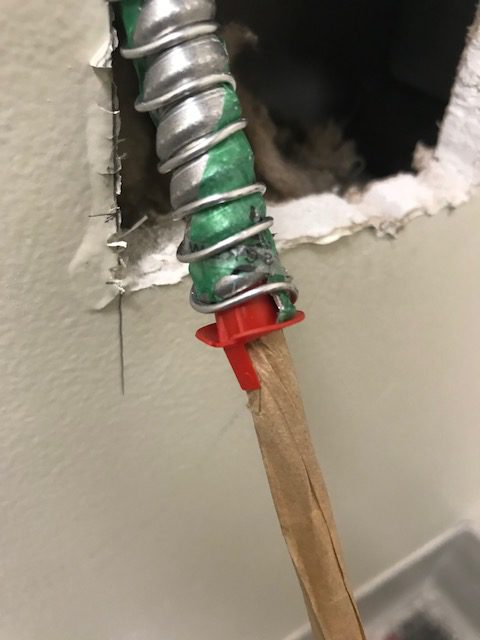
Next comes the fun part: fishing wire down the wall and attaching it to the box with a small connector. At the very top of the wall, a small square is cut out of the drywall. From there, we use “fish-sticks” to pull a string from the box up through the wall. The string is attached to a piece of MC cable, which is basically several wires encased inside a metal shell.

MC cable with red-head attached

MC cable with red-head attached

Pull the string up the wall with the MC attached. This all sounds much easier than it is. Doing this by myself takes quite some time since I have to go up and down the ladder to facilitate the movement of the wire up the wall. With two people it is much easier. One person can pull the string while the other pushes the wire up from the bottom.

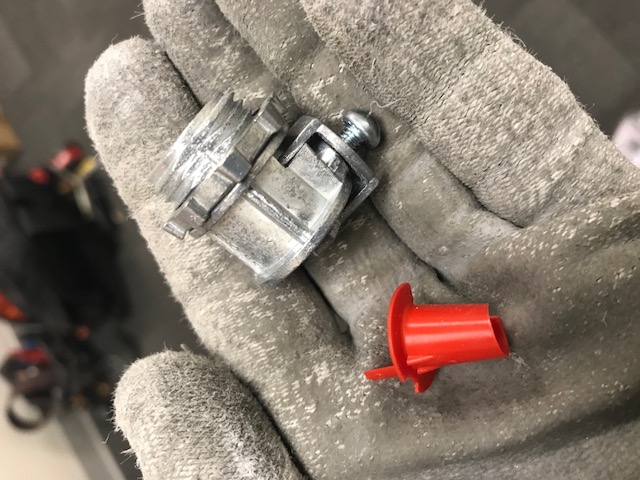
A connector is installed on the end of the MC cable along with a small piece of plastic that is meant to protect against shorts where the wire comes through the box. The slang for these pieces of plastic is “red-heads”. I don’t know the official name for them.

MC connector with red-head

MC connector with red-head

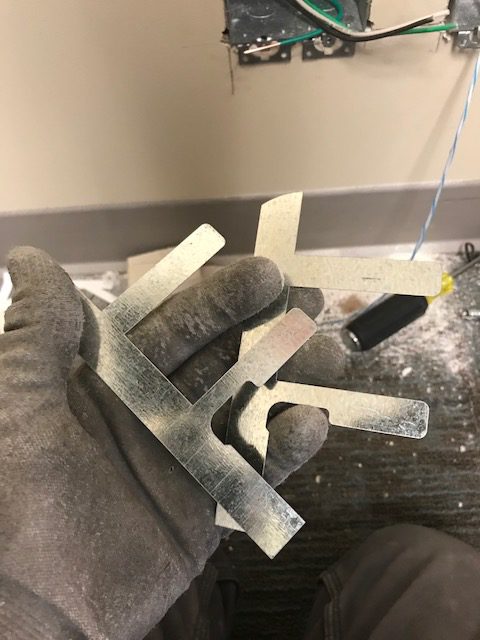
Once the connector is tightened down, the process is almost finished. The boxes are secured to the wall using metal tabs that we call “jiffy clips”. There are a whole host of other nicknames for these things, probably regional: battleships, F straps, Madison straps, ears, hold-its, etc.

jiffy clips

jiffy clips

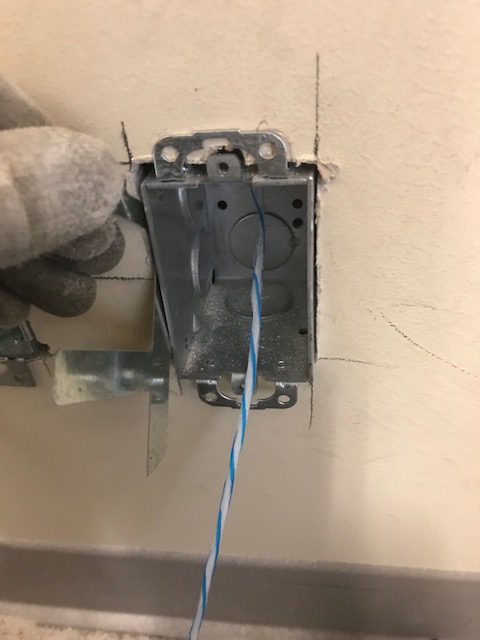
The clips slide into the wall on the side of the box.

inserting jiffy clips

inserting jiffy clips

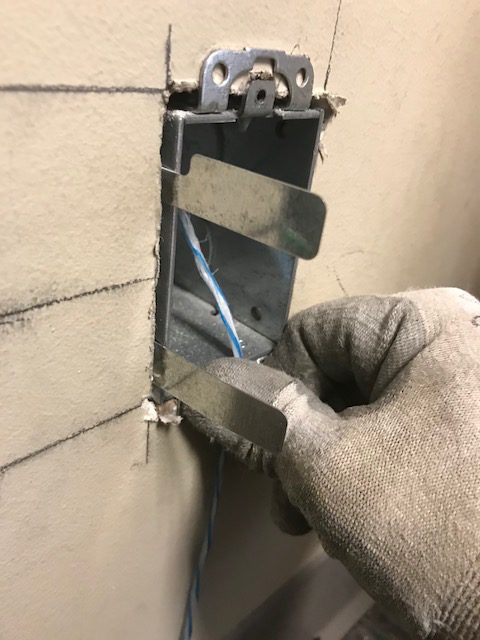
jiffy clip inserted into the wall

jiffy clip inserted into the wall

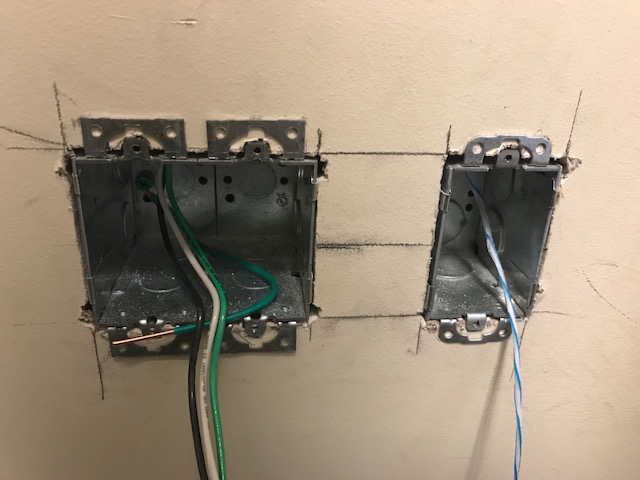
The tabs are bent in and secured with pliers. And this is the finished product –

finished cut-in boxes

finished cut-in boxes


Shocked by 277 and 120 volts

Last week I was shocked twice, once by 277 volts and once by 120 volts. Neither was my fault.

The first instance was when I was in a ceiling working on pulling wire into a 277 volt lighting circuit. I had tested the wires to see if they were hot using my “hot stick“. I had disassembled the wires in the junction box in order to remove an old light and install a new piece of conduit that would run down the wall to a new dimmer switch.

As a co-worker prepared to feed the new switch wire up the wall to me, I grabbed the wires in the junction box above me to move them out of the way. That is when I received the shock in my left hand. After yelling some choice words, I found out that another co-worker had turned on the wrong circuit breaker. What I learned from this accident is that I should cap off all wires with wire nuts after disassembly in order to prevent touching bare wire.

The second instance was when I was wiring up a dimmer switch on a 120 volt circuit. I tested the wires. They were not hot at that moment. A few seconds later I received a jolt. Someone had turned on the breaker to check to see if some lights were fixed further down the hall. There was not much I could have done in this scenario. There were people in and out of the circuit breaker panel. There was a bit of chaos. The only thing I could have done was to walk away from the switch until things had settled down and I could get an assurance that the circuit would remain off. What I learned from this accident is to trust no one when it comes to a circuit being on or off. If they say it is off, I need to verify it myself. I also need to check my surroundings. If other workers are in a rush, I need to be constantly vigilant.

Never miss a chance to shut up

As a green helper, it is important for me to remember that I should never miss a chance to shut up and listen. I don’t talk much to begin with, but I should especially keep it to myself when I think there is a better way to do something. There isn’t a better way for me to do it, not yet. That is because I have been doing this job for a little more than 60 days. I don’t know what I am doing, so there is no way I can know a better solution to a problem that has already been solved.

It is different if I am in charge of the solution. I can improvise if needed, improvise within the knowledge and skills that I have acquired in this short period of time. For example, there are sometimes multiple ways to do a conduit run even when they are short. I have done several such runs on my own and have managed to get them routed to the correct spot with minimal bending, get everything level, and get everything secured to the ceiling or wall the correct way. Had I been told to do the run in a specific way, I may have had trouble doing it. I have had that trouble in the past. See this post on conduit bending as an example.

Phases and circuit wire colors

Identifying circuit colors in three phase 120/208 volt panels (or how I learned the Rule of 6)

W

e have been pulling a lot of wire lately. Each of the twelve rooms we are wiring have their own circuit, which means the wire colors are different with each pull. My boss kept testing me on which circuit number we were doing in a particular room and then, if I got that right, which color wire corresponded with that circuit number.

Phases and circuit wire colors

Phases and circuit wire colors

This is what I know for sure: I don’t know much of anything yet. I was and am lost, but I will do my best to explain what I do know and how I figured out how to know the correct color of a circuit.

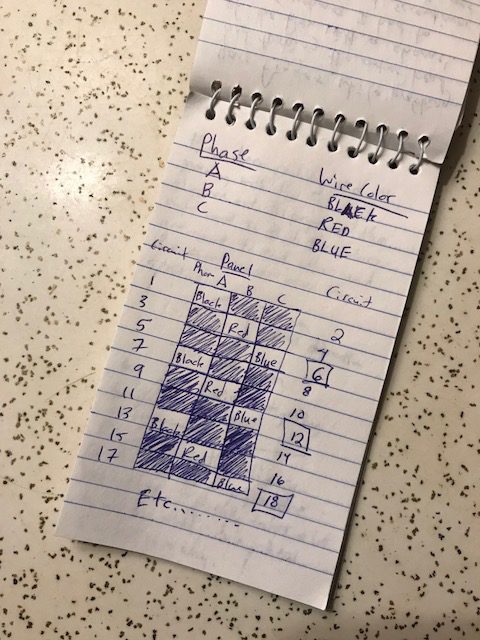
In commercial 120/208 volt electrical systems, there are three phases – A, B, and C. Each phase is one of three colors – black, red, or blue. Phase A is circuit 1 and 2 (black), Phase B is circuit 3 and 4 (red), Phase C is circuit 5 and 6 (blue). It then starts over with the phases. Phase A is circuit 7 and 8 (black) and on down the line. Phase A circuits are always black wire. Phase B circuits are always red wire. Phase C circuits are always blue wire. Seems easy enough to remember, right? Not for me, not until I learned the “rule of 6“.

Each multiple of 6 is always blue: 6, 12, 18, 24, 30, 36, 42, 48, 54, 60, … are all blue circuits as are the numbers right before them: 5, 11, 17, 23, 29, 35, 41, 47, 53, 59, … It is not necessary to remember those odd numbers if you remember the multiples of 6. If you remember the color pattern black, red, blue, then you can figure out the other circuit colors by finding the closest multiple of 6 and backtracking.

For example, if you had to pull wire for circuit 21, you would find the closest multiple of 6, which is 24. Since 23 and 24 are both blue, it means that 21 and 22 are both red, so the color wire needed to install for circuit 21 is red.

I had to write out a cheat sheet chart for myself in the notebook I carry with me. It really helped me to visualize what a panel would look like. Hopefully some of this makes sense.

Conduit bending and installing immersion

On Thursday, the boss asked me and the other green helper to run four lines of conduit in one of the rooms we are working in. The start of three of the runs were basic 90 degree bends, simple enough.

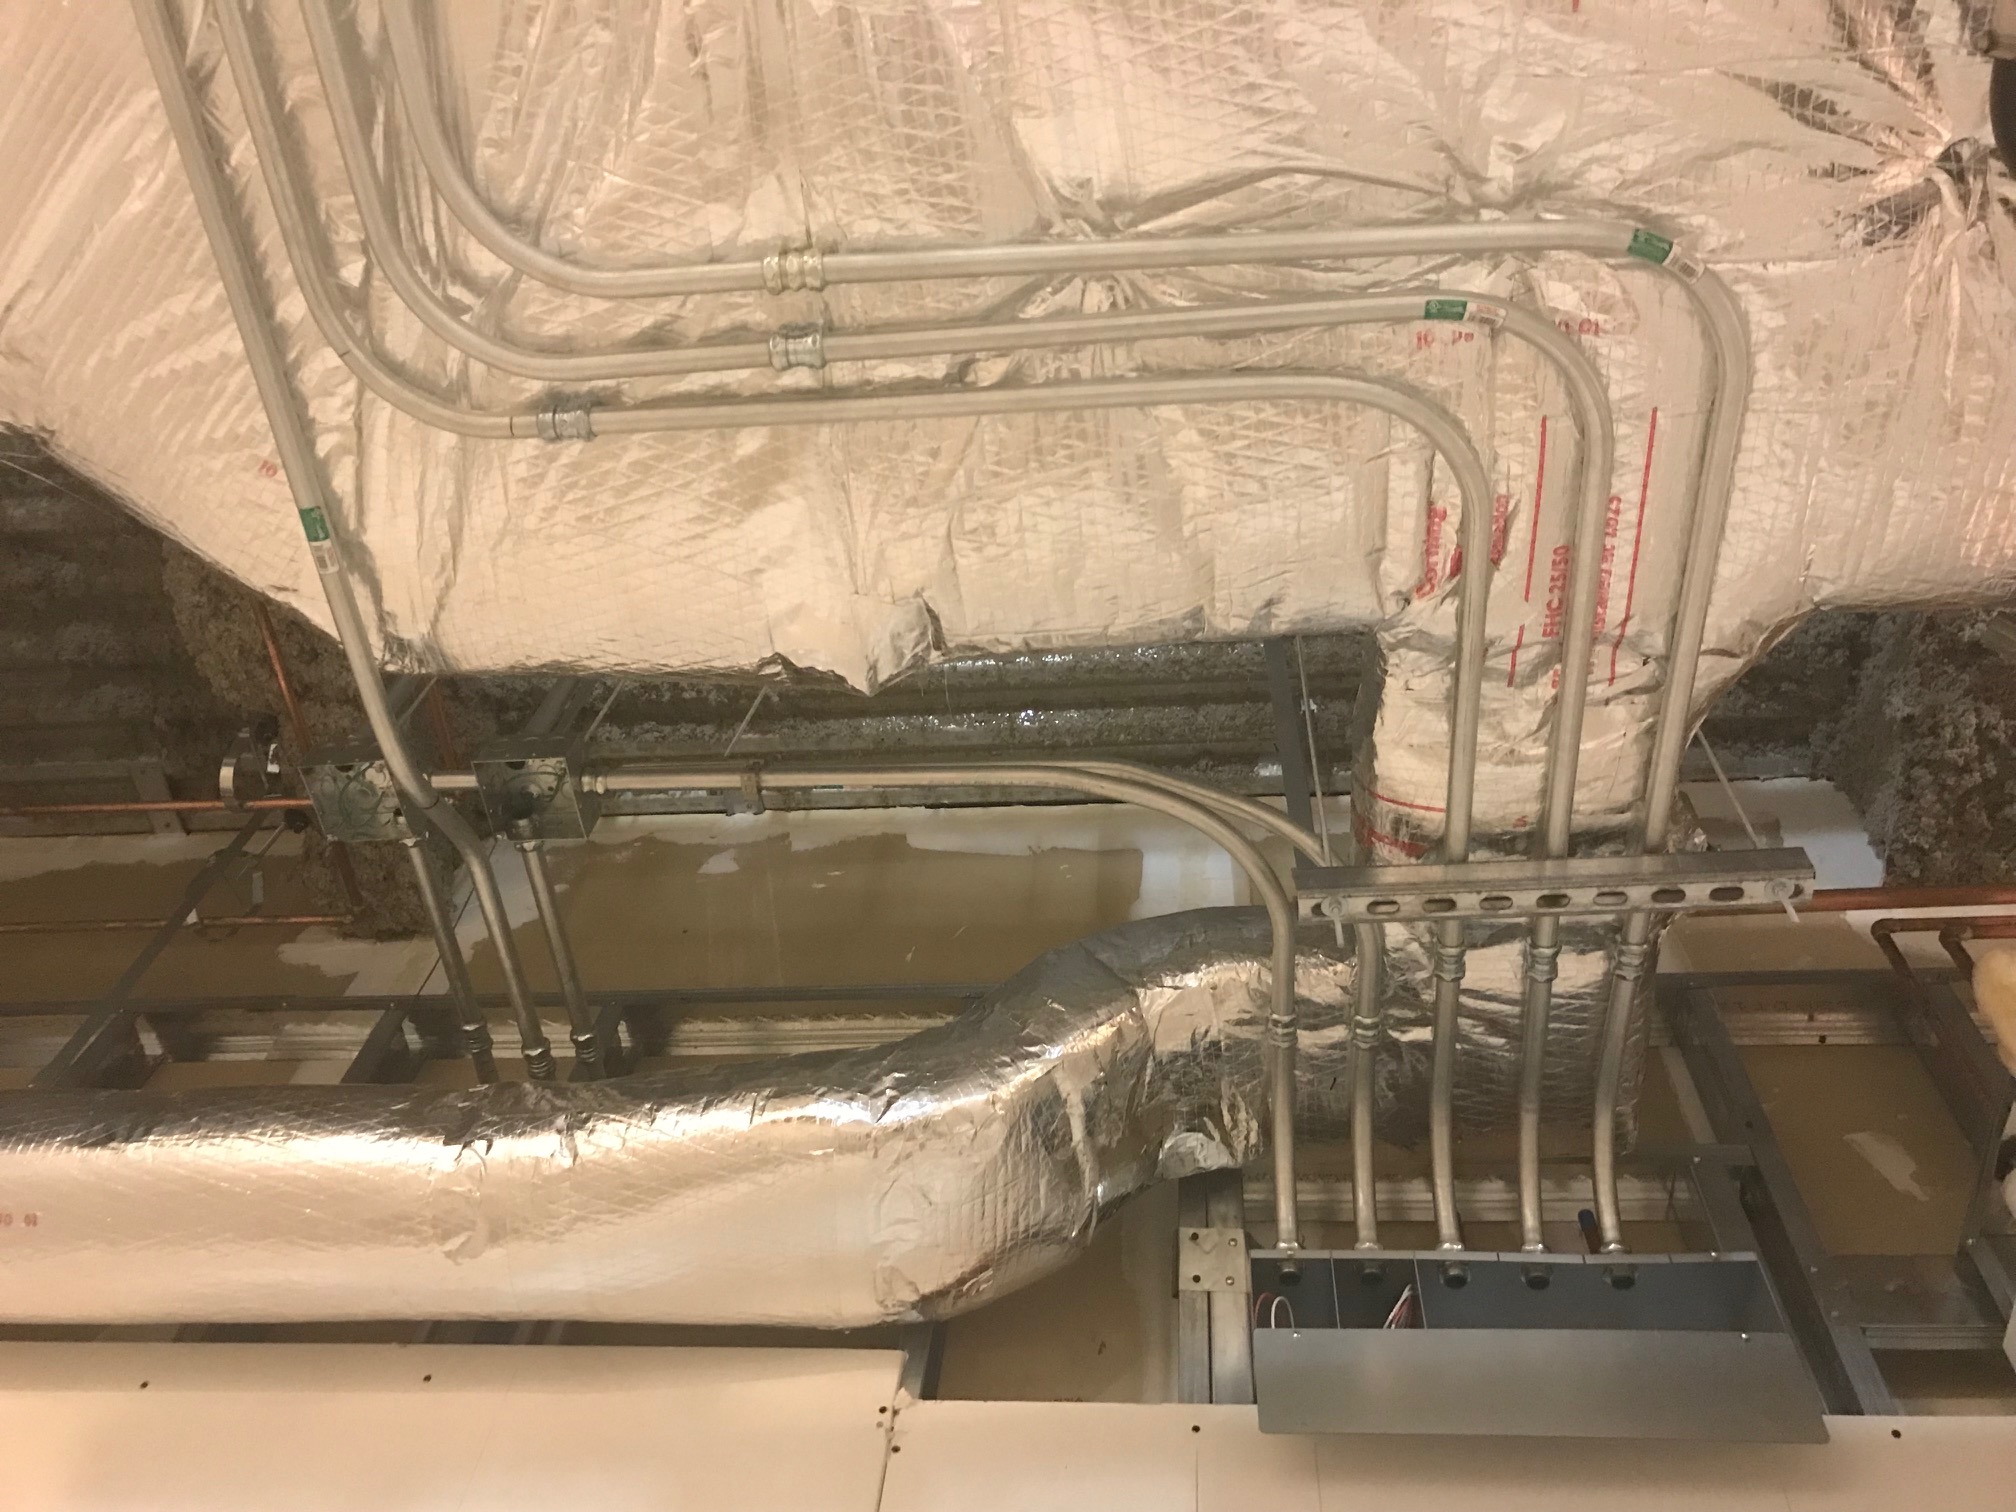
After that we were stuck and the boss left us on our own. We could run the conduit up and over an HVAC duct and then down under the sprinkler system. Or we could go below the duct and go in between several copper water lines and the sprinkler system. Ether way was messy and well above our experience level. It was then that fear and apprehension started to creep in. This is what it should have looked like when we were done:

Until that point, I had only bent a couple of pipes and handed them to someone else to install. When I did install pipe it was with pipe bent by someone else with a layout planned by someone else.

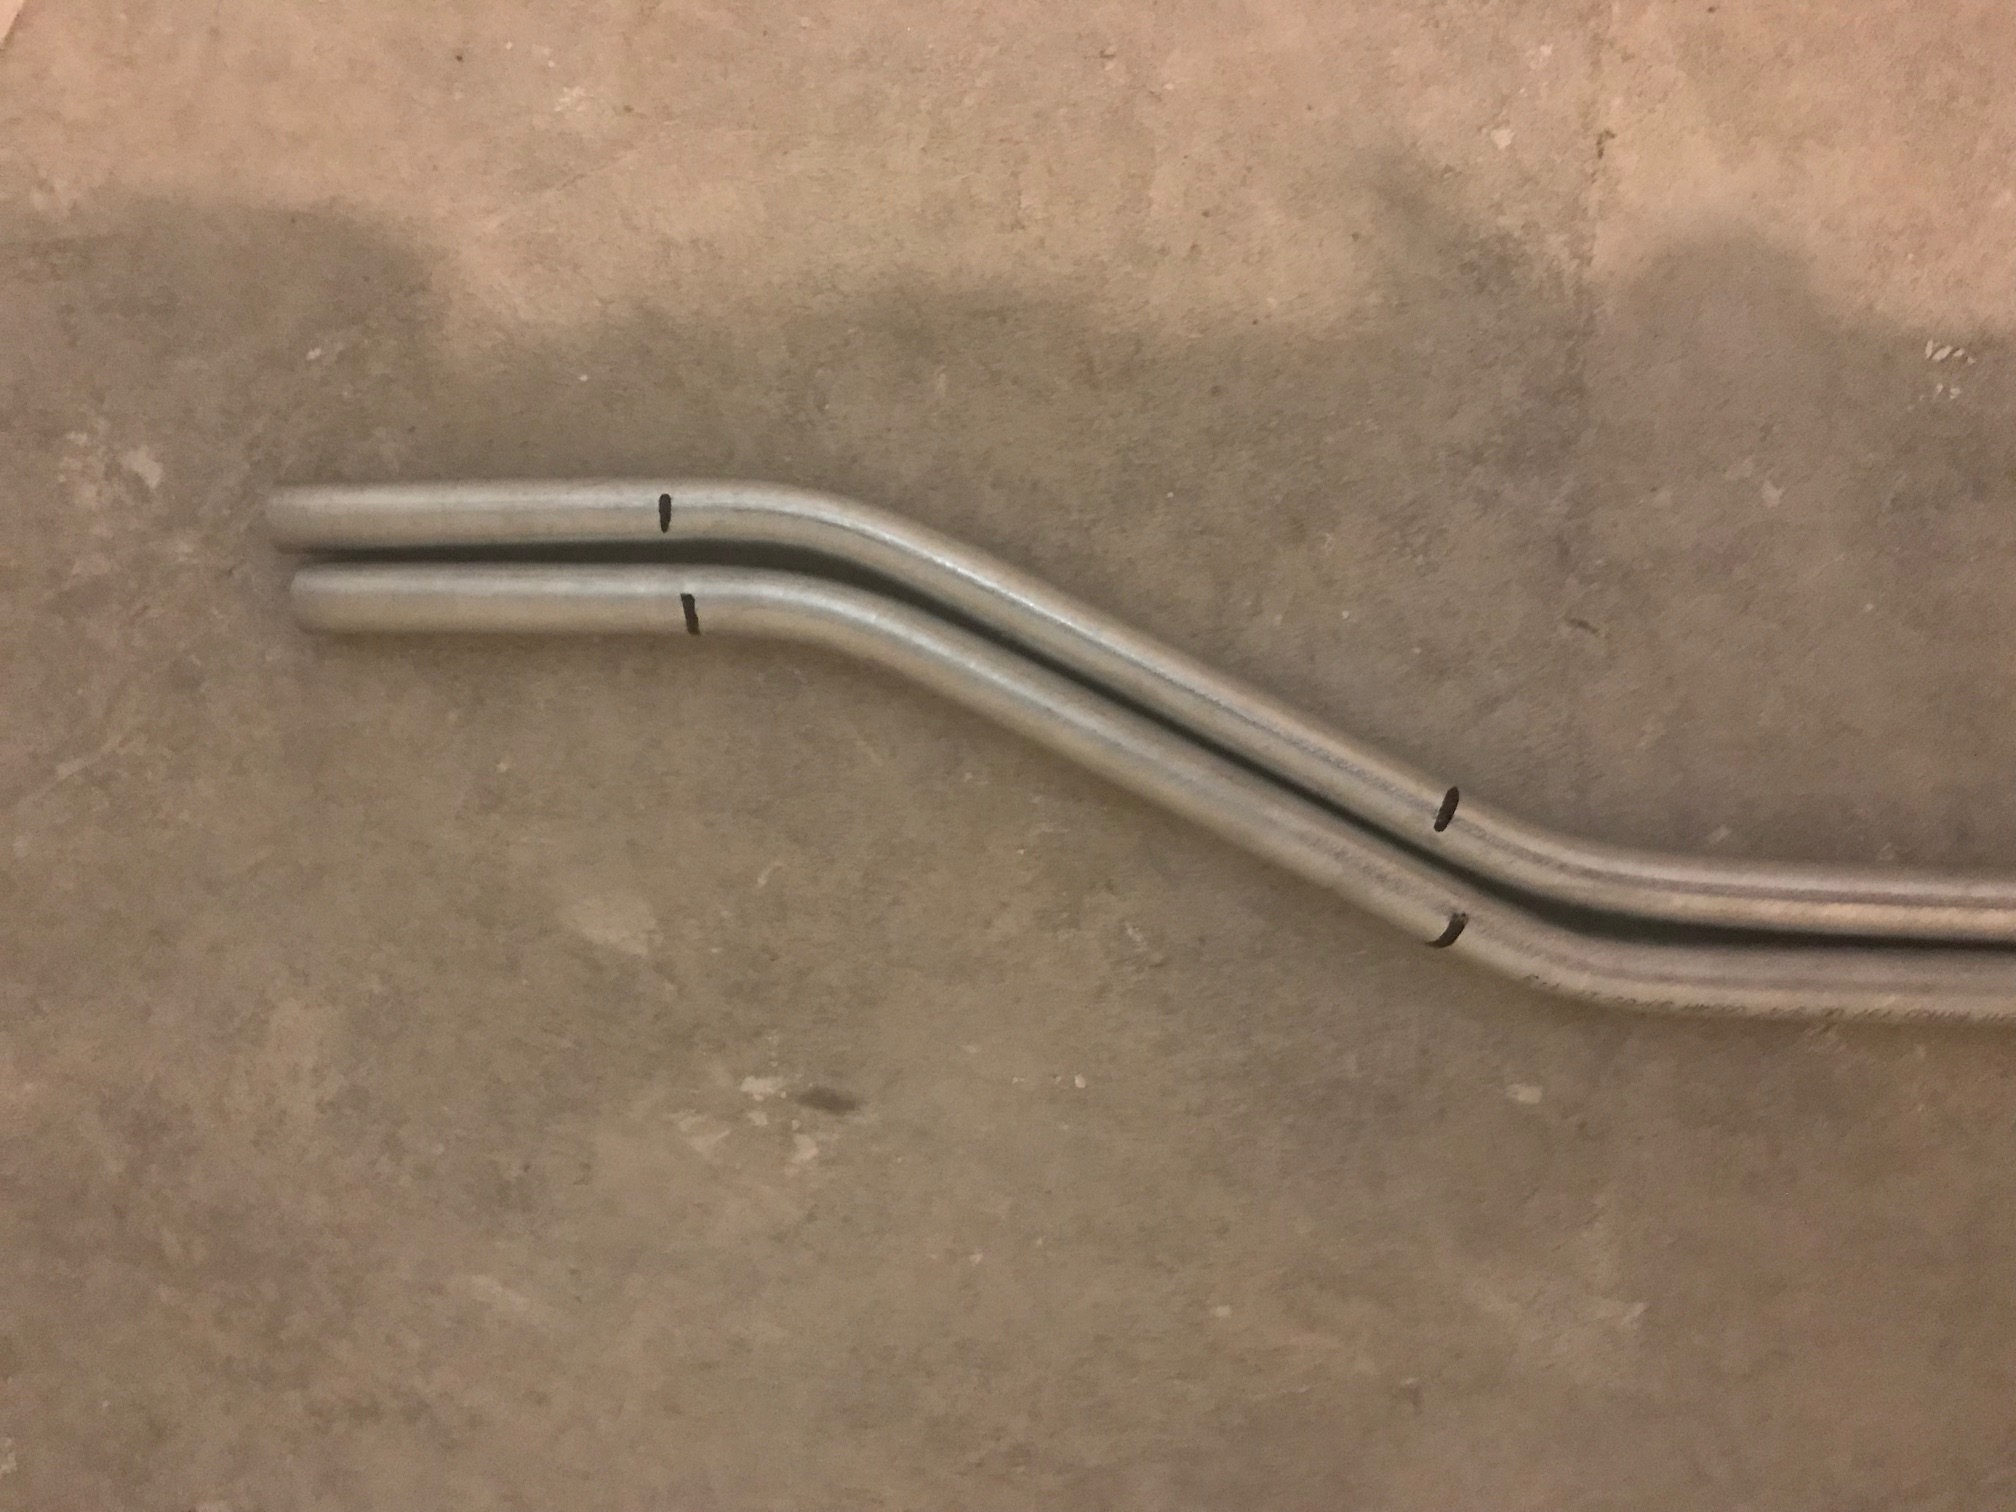
This was different. We had to plan, bend, and install these conduit runs on our own. This was our first immersion; it was like drowning. We messed up many of the first bends either by measuring incorrectly or by doing poor bends. The conduit needs to be at perfect angles or it won’t fit together. It needs to be bent in straight lines or it won’t be level or it will look horrible once installed. We made pipes that looked awful once we got them up.

When we had finished three runs, the boss came back.

“Trace, how did I ask you to run these pipes?”

“Uh, like this?”

“No, I said to do [this this and this].”

“I must have misheard you.”

“You can leave it like this, but there was a better way to do it. Since you are committed to this way of running them, make sure you match the fourth run up with these three.” Then he left us alone again.

That was far from a confidence booster. We made the fourth run similar even though it came from a different part of the room. We had been in the same room doing this for seven hours, getting more and more frustrated with ourselves and each other. After we finished the fourth run and started cleaning up, the boss came back. He looked at our work cockeyed.

“Take this down and do it again. This can’t stay up like that. Too many bends, too close to the copper lines, looks awful. By code, how many degrees of bend can you have between boxes?

“360 degrees.”

“Yep. And you have more than that. Like I said, take it down and start over.”

This was what it felt like to drown.

All of the tools I used during my first week as an electrician

First week tool use

M

y first week as an electrician went–in many ways–the way I expected. I expected that I didn’t know anything other than how to use tools. It went differently in other ways, mainly the fact that I quickly picked up on the work I was expected to do and was even able to work on my own at the end of the week. The biggest question mark heading into Day One was which tools I would need and which tools I would not need. My first day I used three tools – a torpedo level, a measuring tape, and a conduit pipe reamer – and a Sharpie marker. As the week progressed, I added more and more to the tools I was using all the time. It still didn’t match the enormous amount of tools I took with me on the first day. I brought those home with me until I need them.

After the first day I was able to get over some of my newbie jitters and get a rhythm going. What follows is what became my basic tool set at the end of the first week as an electrical helper. My next posts will be about the actual work that I did during the first week.

All of the tools I used during my first week as an electrician

All of the tools I used during my first week as an electrician

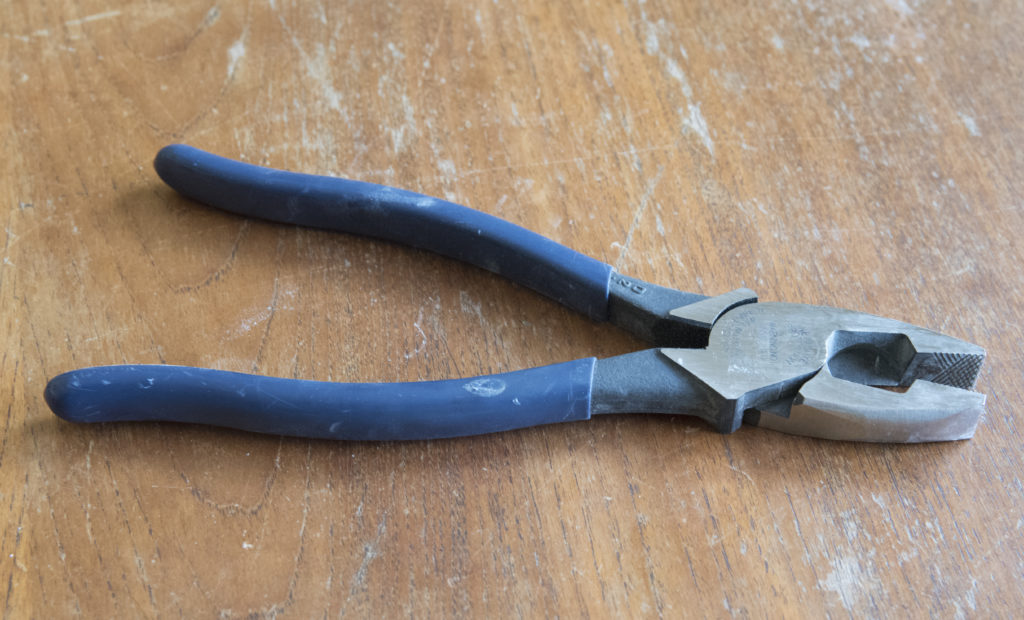
These lineman pliers are used for just about everything: prying off tabs from metal boxes, hammering, and of course cutting.

Lineman side cutting pliers

Lineman side cutting pliers

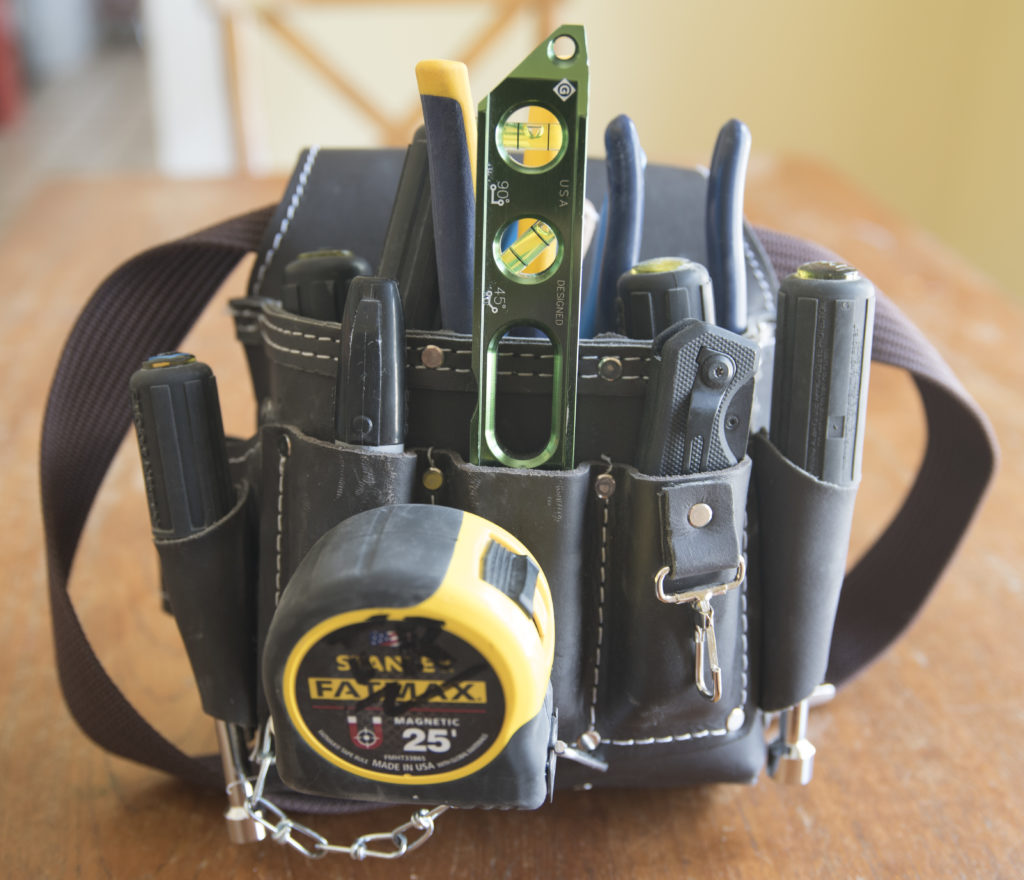
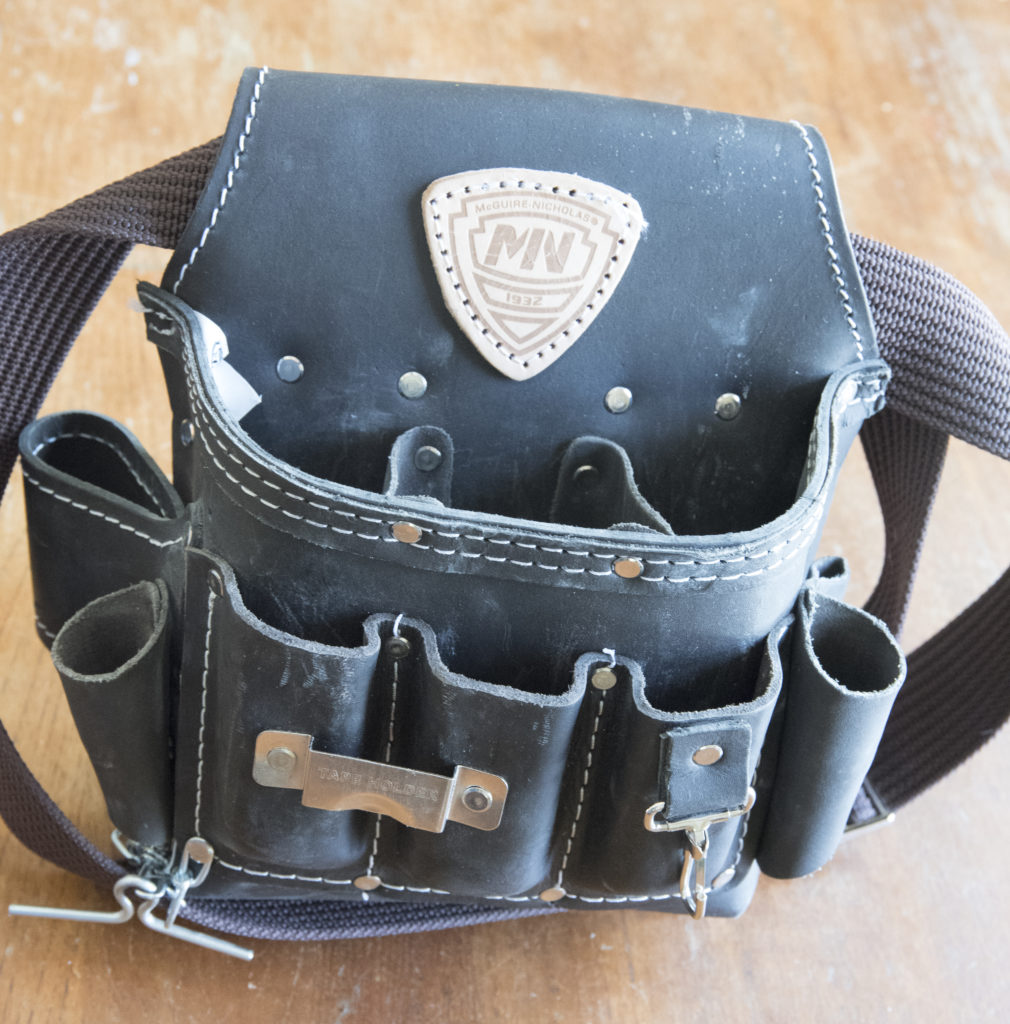
This 10 pocket tool pouch holds everything I need at the moment.

McGuire-Nicholas electrician tool pouch

McGuire-Nicholas electrician tool pouch

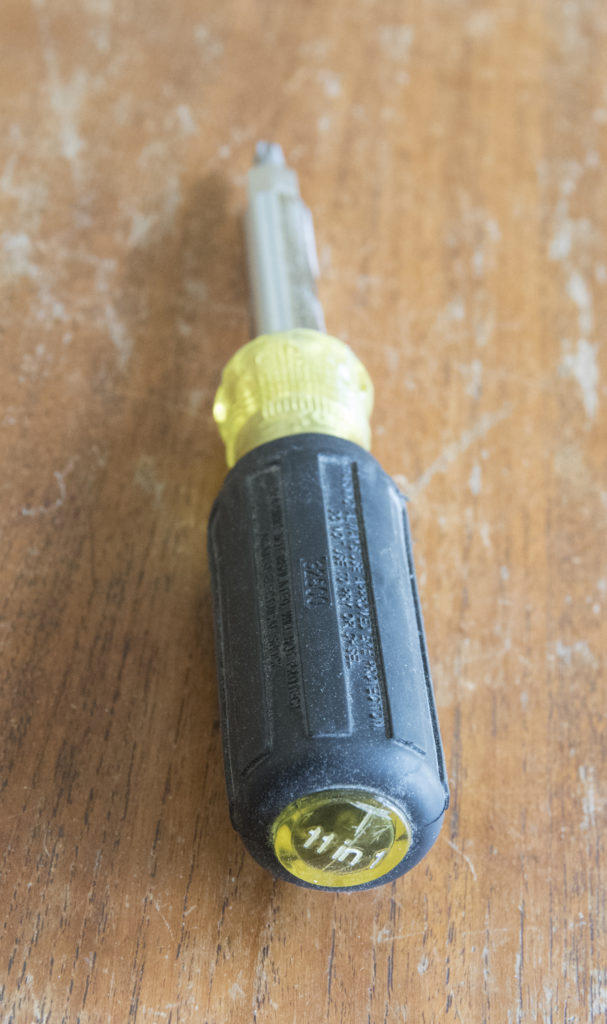
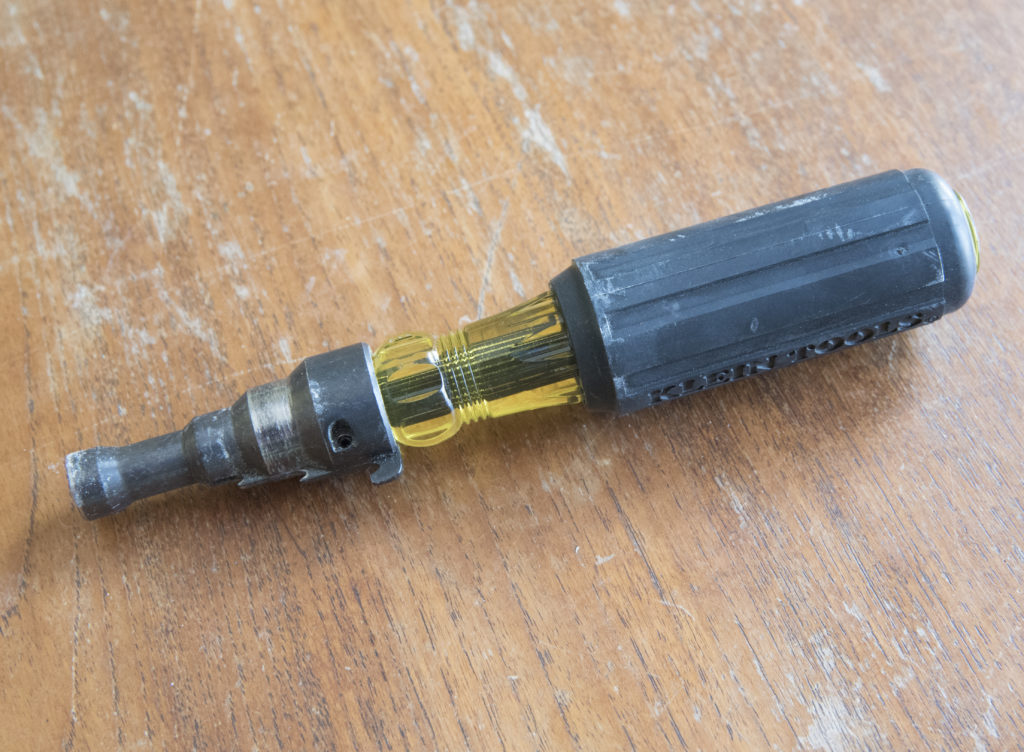
The Klein 11-in-1 screwdriver/nut driver is just what it says it is, eleven tools in one.

* Integrated screwdriver and nut driver shaft holds 8 popular tips and converts to 3 nut driver sizes
* Includes industrial strength heat treated bits: 3/8-inch, 5/16-inch and 1/4-inch nut drivers, #1 and #2 Phillips, 1/4-inch and 3/16-inch slotted, T10 and T15 TORX®, and #1 and #2 square recess
I have mine set on 3/8-inch nut driver and #2 Phillips head screwdriver.
11 in 1 screwdriver/nutdriver

11 in 1 screwdriver/nutdriver

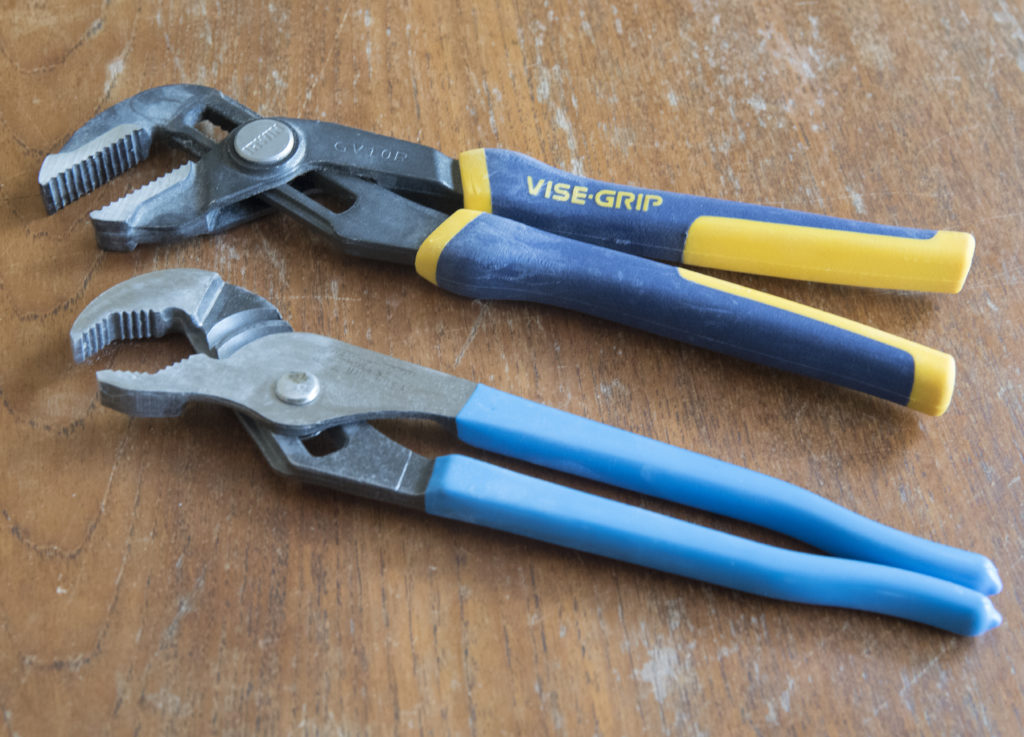
Channel locks are used for tightening down couplings and connectors.

A set of channel locks

A set of channel locks

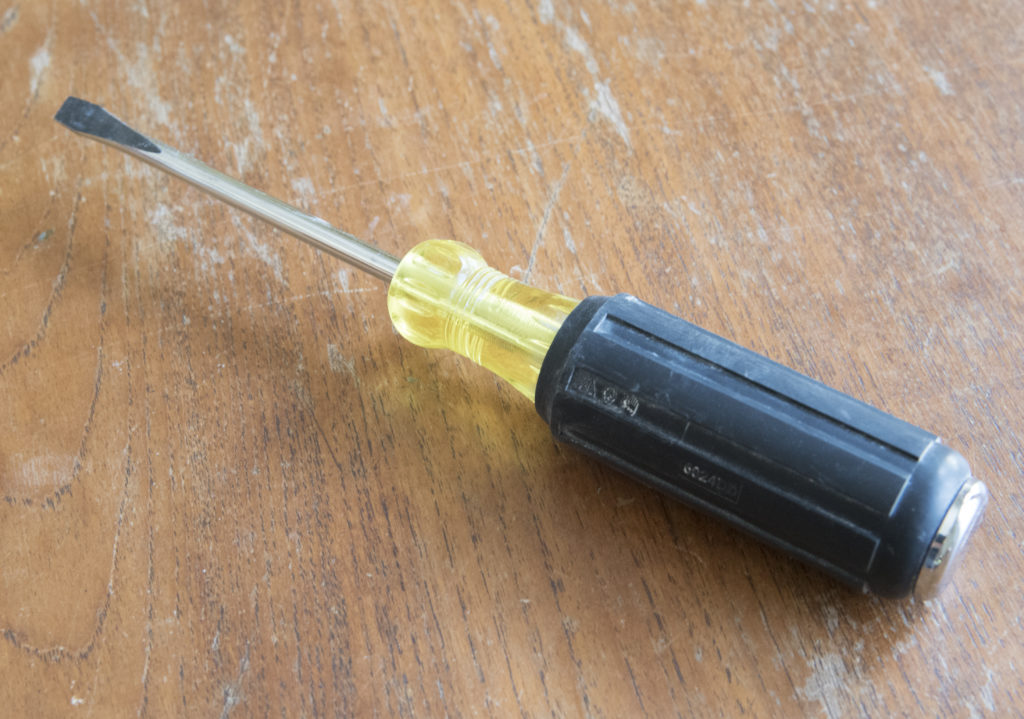
I used the Klein demolition screwdriver to pry off some random drywall.

4" demolition screwdriver

4″ demolition screwdriver

The tool I used most of the first two days is the conduit reaming tool. When a piece of conduit is cut, there are ragged edges left over. The reamer gets inserted into the end of the conduit. By twisting the reamer back and forth, the rough edge is smoothed out allowing for a better fit with couplings and box connectors.

Conduit reaming tool

Conduit reaming tool

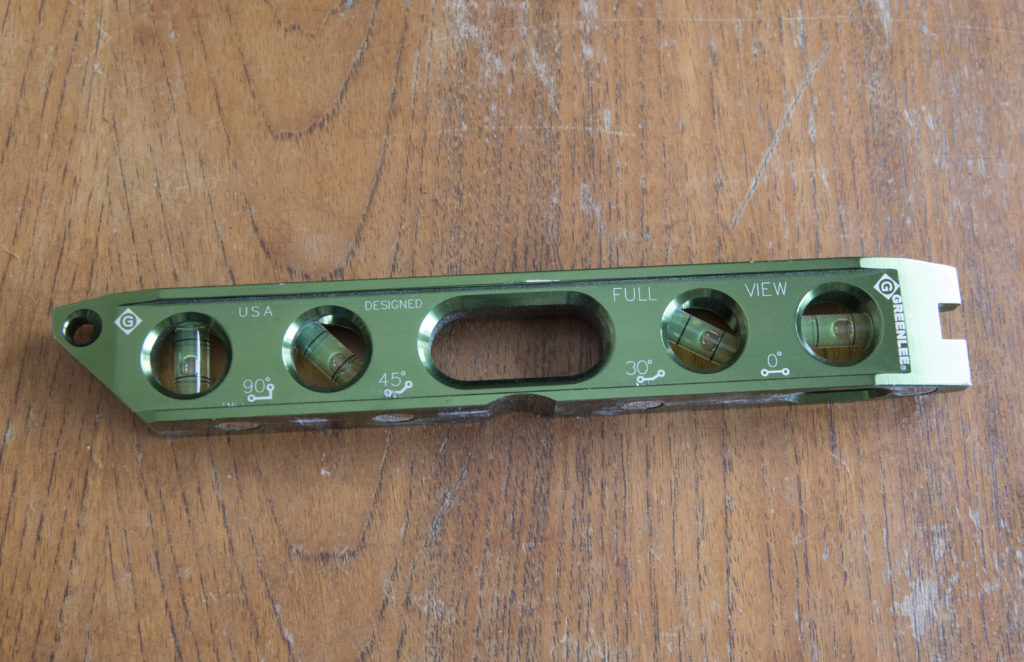
Torpedo level with four magnets for sticking to conduit:

A magnetic "torpedo" level

A magnetic “torpedo” level

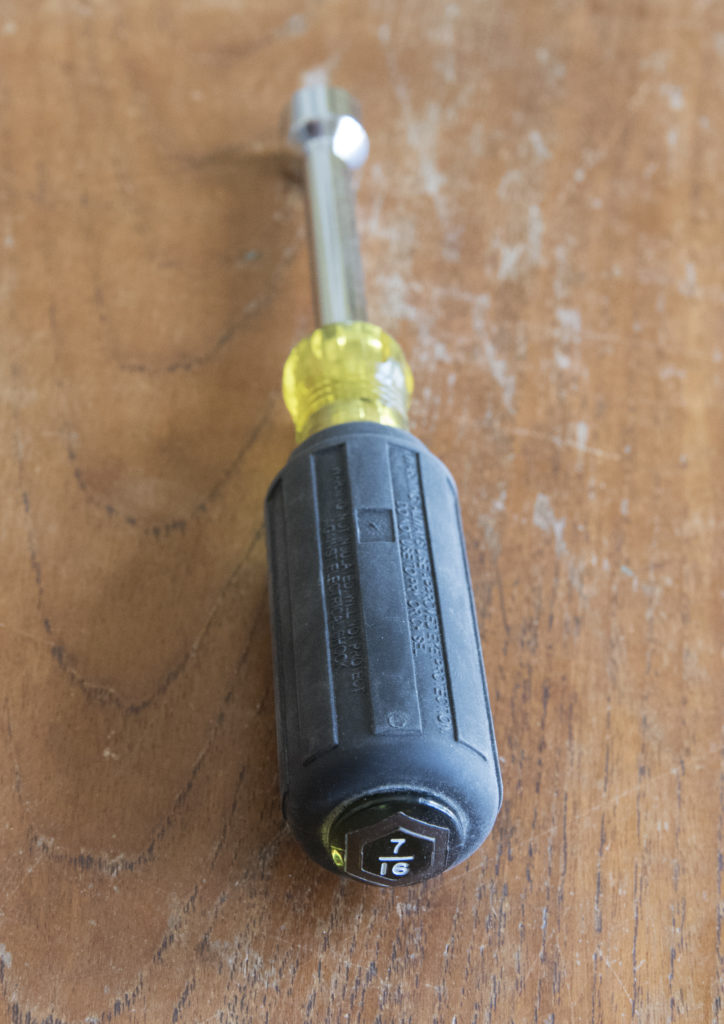
The nuts used on most things last week were 1/4″-20 hex nuts. The 7/16″ nut driver works with this size nut. I had to buy one after work one night after realizing that I would need it for what I was going to be doing the next day: turning and tightening a lot of 1/4″-20 hex nuts. The other electricians call this tool a “brown dot” because of the color of the circle at the end of the tool.

A 7/16" nut driver, AKA "brown dot"

A 7/16″ nut driver, AKA “brown dot”

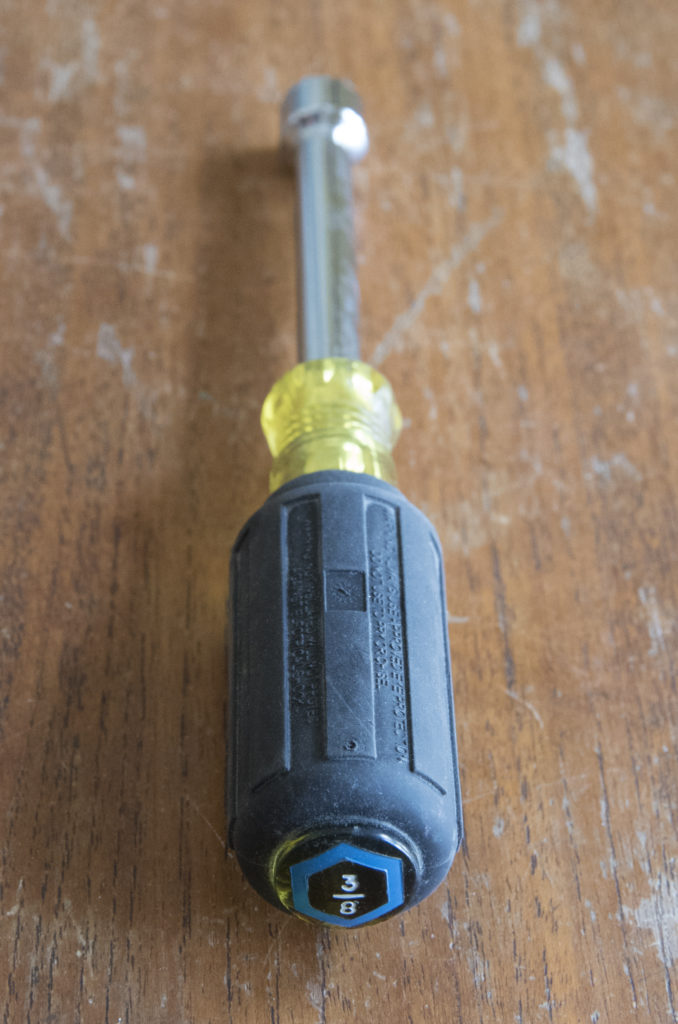
The 3/8″ nut driver is used for tightening down pretty much everything else. The other electricians call this tool a “blue dot” because of the color of the circle at the end of the tool.

A 3/8" nut driver, AKA "blue dot"

A 3/8″ nut driver, AKA “blue dot”

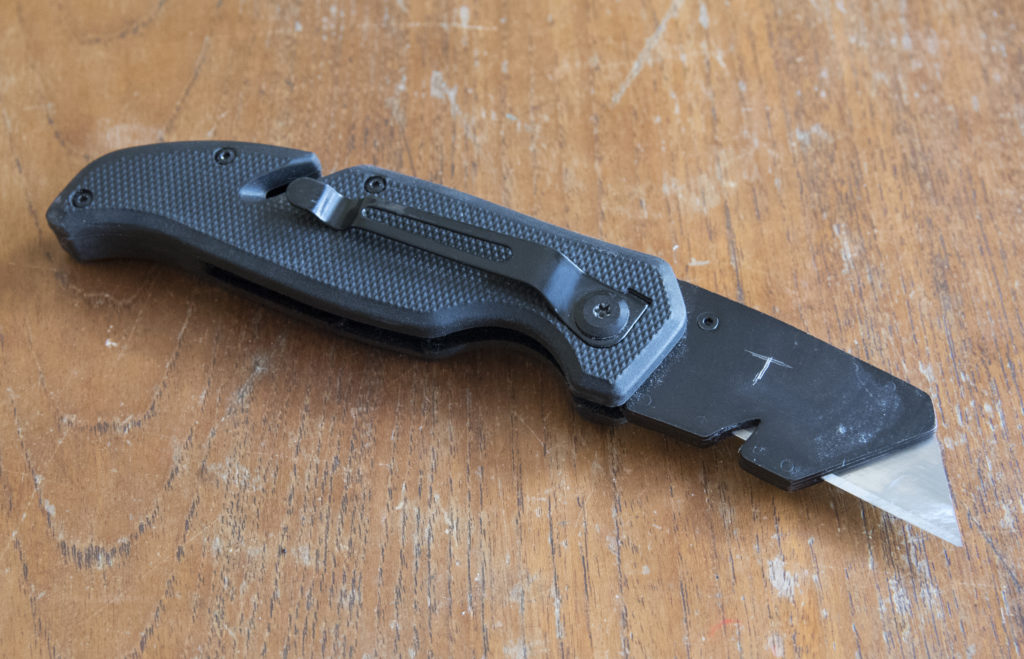
I used this folding razor blade knife for cutting the tops off boxes and the tape off of bundles of conduit.

Folding razor-blade knife

Folding razor-blade knife

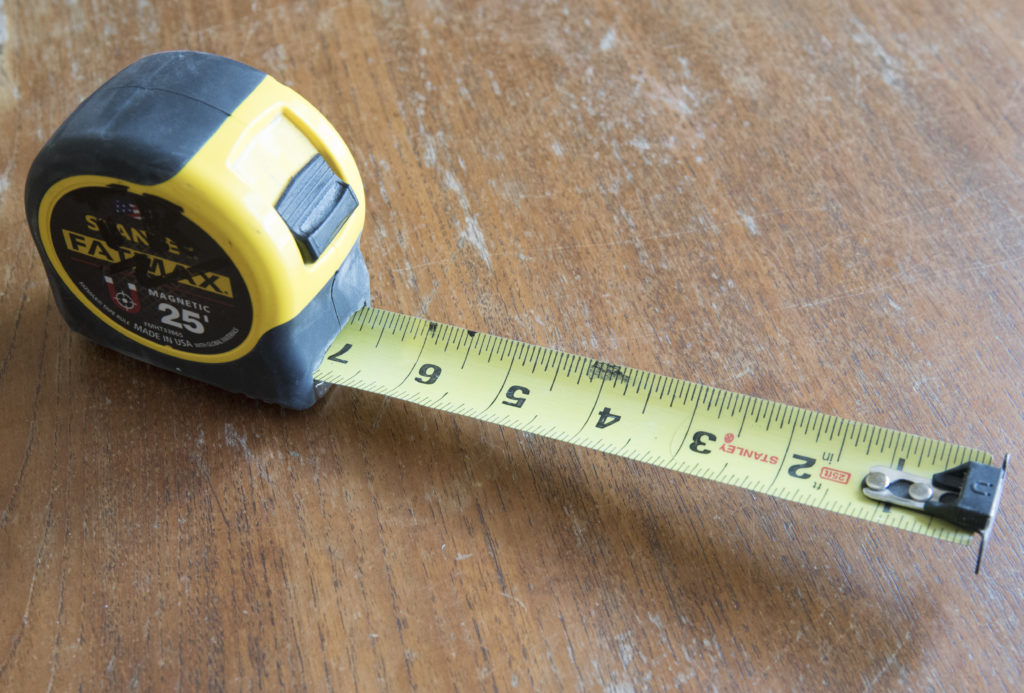
A magnetic tipped measuring tape is another tool that I used the most during the first few days.

FatMax 25' magentic tape measure

FatMax 25′ magentic tape measure

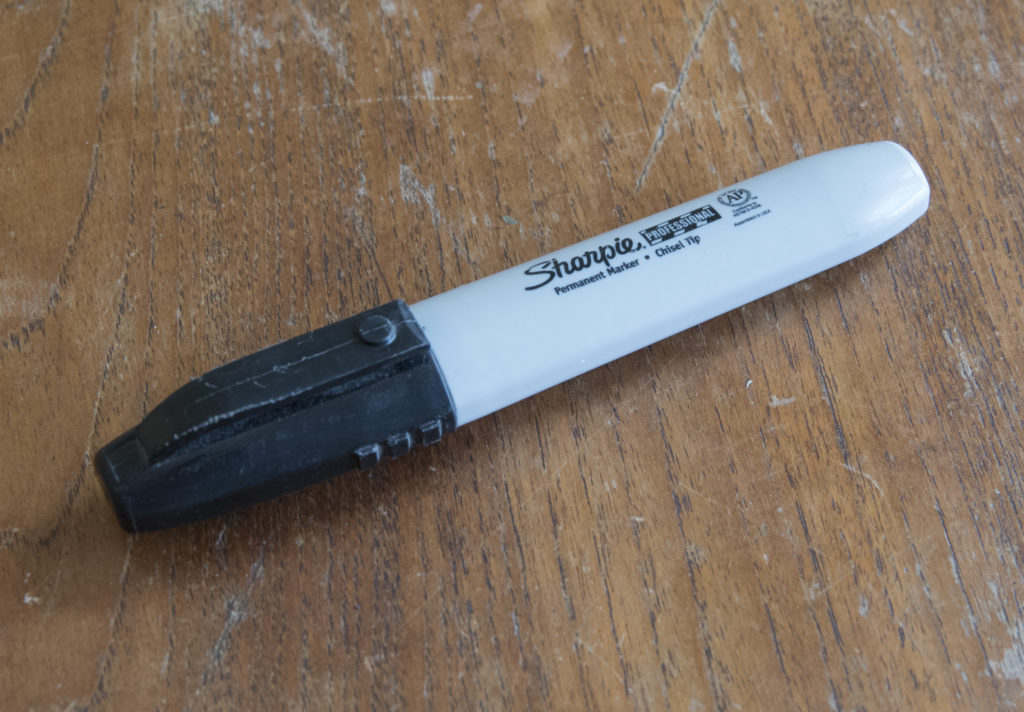
And lastly, a Shapie for marking where cuts will go on conduit and rods.

Basic black Sharpie marker

Basic black Sharpie marker

Next week I will begin pulling wire. For that job I will need to add more tools. When that happens, I will update my bag and this post.

Newbie jitters

I

’m watching YouTube videos on how to bend electrical metallic conduit (EMT) in various ways such as the “saddle bend” and the “box offset bend“. I am also learning how wire is pulled through that conduit. I am amazed at how many videos there are on the subjects.

I’m watching these videos because I know that this is what I am going to be doing for the foreseeable future. I am coming into this trade just about as green as a person can be even though I am older and have been working since I was 12 years old. So I am nervous about how I will perform.

From there I moved on to videos on how to use some the tools I had to buy but had never used in the past. I am mechanically inclined and have used most hand tools and power tools out there. But I have never had an occasion to use something called an armored cable cutter, also known as a roto-zip MC stripper.

You use this tool to trim the aluminum from metal-clad (MC) electrical wire.


Trimming metal clad aluminum electrical wire with roto-zip stripper

Soon I will add a post about all the tools I needed to purchase.